
I'm exited ^3^///
I've been dying to do this post for a long time but my old blog wasn't the right place so I decided to start a new one just for illustrations, my graphic design and things I want to share with you.
As you maybe know, I'm studying communication design in a cute little city in the south of Germany: the lovely Augsburg <3 This term I got the chance to attend the illustration class *yay* The first project we did was illustrationg playing cards while using a really interesting technique. The technique is called "blast technique" ("Absprengtechnik" in German) and I thought it was prety interesting to try it out. The nice thing about this technique is, that the result looks like wood or linoleum cut but is far not that time consuming.
I documented my work and thought, why not sharing it :)
1st step: You will need
- pencil, eraser and whatever you need for your sketch
- a piece of paper (as thicker as better)
- a flat wooden board a little bit larger than your piece of paper
- bone glue tape
- a clean sponge
- opaque white (water soluble)
- ink (waterproof)
- brushes (a very small and a normal one)
- cutter and ruler
2nd step: Do a pencil sketch
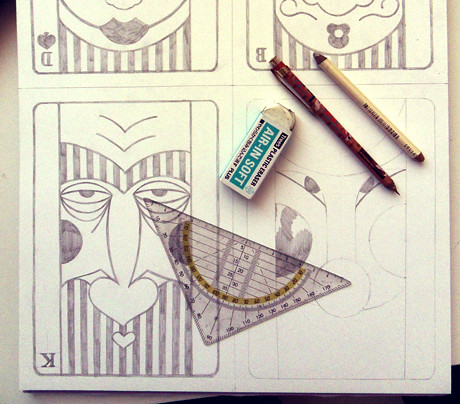
Of course you can sketch whatever you want :3 But take care of a few things.
- Don't use too small details and too thin lines (at least 2mm).
- Try to work clean. No pencil strokes where you don't need them
- keep in mind, that the illustration is going to be black/white so play with shadows and lights :)
- leave a white frame on the paper (at least 2 cm)
3rd step: Glue it on the board
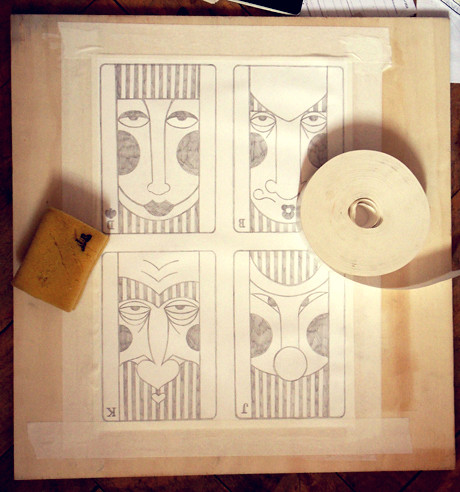
Wet the backside of your drawing carefully with the spoon. Don't bother, that the paper is going to wave. The waves are going to disappear after the paper drys. Then place it in the middel of the board. Wet four pieces of the bone glue tape to make it sticky and glue your piece of paper on the board with them. Now let the paper dry completely. The waves should be gone now.
4th step: Paint it white

Now you need the small pencil and the opaque white.
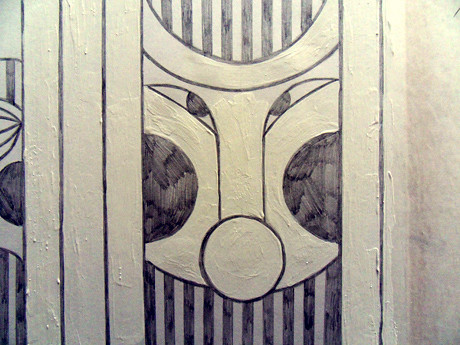
Paint everything white, that should stay white. I know, that sounds really odd but you're going to understand this step later :D
You can use a little bit of water to make your white more flexible but take care, that you don't use too much. Paint a thick layer of white. Now you know, why I recommended you not to draw too many details. This step is really time consuming but it's going to be worth all the work :3
5th step: Paint it black
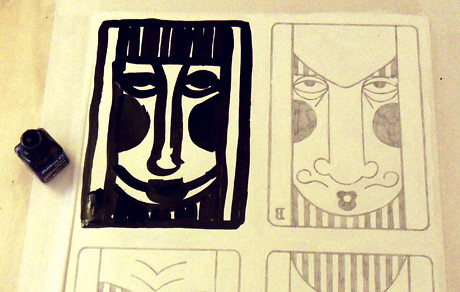
Make sure, that the white is completely dried! Now take a brush and the (waterproof!) ink and paint roughly everything black, that should be black. No need to work clean at all but work as fast as possible and don't press the brush on the paper.
Looks odd, doesn't it *laughs* but don't worry :)
6th step: Make it wet
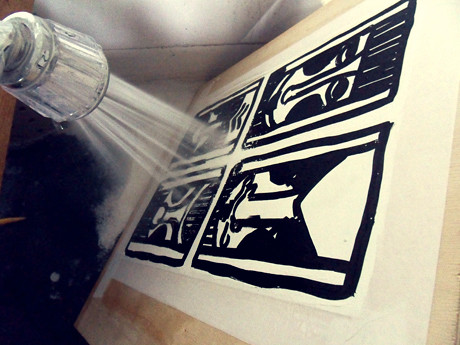
Let the ink dry. Now, place your board in the shower and usethe shower head to "blast" the water soluble white of. Only the waterproof black will stay! Your shower head probably won't be able to do it on it's own so use the sponge to dab the white of. Be careful and don't hurt the paper.

Almost done :) Now let your work dry completely. Don't worry, the waves are going to dissapear again because we glued it on the board. You can cut the dried illustration out with a cutter and a long metal ruler.
As you can see on the photo above, theres an ugly dark spot on the eye of my king. That's because I used too many water to thin my opaque white down. I correct this mistake with white correction ink.
7th step: Finally

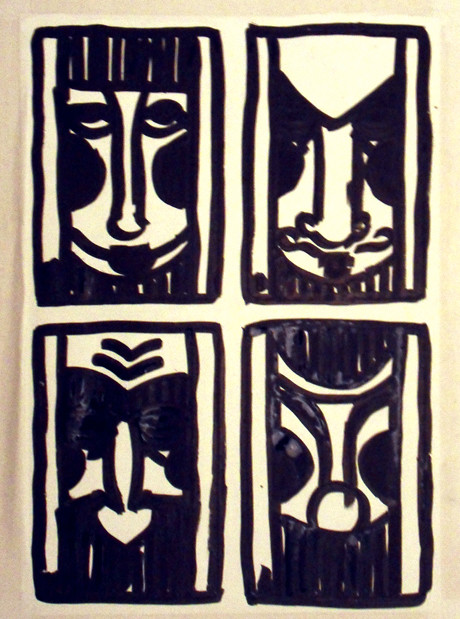
Here's my final work, scanned and cleaned. I shopped the letters and the spades if you wonder.
I really like the final result because it looks so handmade and really fits the drawing style I chose for this four illustrations!
Last step: Just for the laughs
Well, of course this complicated technique didn't work at all at my first try. That's one of the reasons, why I do this tutorial *laughs* to prevent you from the mistakes I did.
This was my first try:

You see, why you should use waterproof ink *laughs* I also had far too many detail and because I didn't sketch clearly, you can see my pencil strokes everywhere!
Done :D
I really hope, you enjoyed this tutorial.
Bye bye,
Kathi
cool technique! And, hm, I like your failed result, too! :D
AntwortenLöschenMe too *laughs* especially the King!
AntwortenLöschenThank you for sharing this tutorial, I'm exited to try this out. I also like your fail results.
AntwortenLöschen