Posts mit dem Label tutorial werden angezeigt. Alle Posts anzeigen

2016-11-05

Ein Hochzeits-Blumenstrauss

Huhu :)

Auf Facebook hat mich jemand gefragt, wie ich die folgende Illustration eines Hochzeits-Blumenstrauss gemacht habe. Da dachte ich mir, mache ich gleich einen Blogpost daraus, vielleicht interessiert das noch ein paar mehr Leute :D Sollte meinen Blog eh öfter updaten, also schlage ich hiermit zwei Fliegen mit einer Klappe ;)

Erst einmal habe ich die Linienzeichnung im Rahmen des Inktober (siehe diese beiden Posts) per Hand gemacht:


Dann habe ich die Zeichnung gescannt und die Linien in Photoshop freigestellt (wie das geht, habe ich unter anderem in diesem Tutorial mal genauer erklärt).
Wenn die Linien so freigestellt sind, dann lassen sie sich ganz leicht einfärben. Auf dem folgenden Bild seht ihr die digitale Grundcolorierung:


Als nächstes habe ich dann angefangen ÜBER den Lines die Blätter und Stile auszuarbeiten:


Weiter geht es mit Blüten und dem braunen Stoff:


Und zum Schluss das Glas. Hier ist der fertig colorierte Strauss:


Dann habe ich den Strauss auf eine graue Textur gestellt und noch ein paar weiße Elemente hinzugezeichnet, um das ganze ein wenig aufzulockern. Über alles wurden auch noch ein paar Texturen gelegt, damit es nicht gar so glatt wirkt. Aber welche genau verrate ich nicht ;) Das ist sozusagen meine Geheimzutat XD

Hier das fertige Bild:


Ich hoffe, das war interessant für euch :) Wenn ihr noch Fragen habt, einfach stellen!

Liebe Grüße,
Kathi

2014-10-14

Evolution of a Webcomic (Part 3)

Huhu :)

Schon wieder zwei Tage frei *freu*
Letzte Woche war ich vier Tage in Frankfurt. Zwei davon auf der Frankfurter Buchmesse mit dem Verlag für den ich arbeite (falls ihr euch übrigens mal gefragt habt, was ich eigentlich den ganzen Tag mache, hier habe ich ein kleines Interview zu dem Thema gegeben) und dann war ich noch mal zwei Tage in Comicdingen unterwegs ;D Die vier Tage waren wirklich toll und ich habe so viel liebe alte Freunde (z.B. die wunderbare Asja, bei der Yi und ich sogar übernachten durften, Jaroo, Eve, Mina und Schlogger )  und neue Bekannte getroffen. Aber es war auch so richtig anstrengend, vor allem die Messe selbst :O Wenig Schlaf, stickige Luft, Sightseeing in Frankfurt, lange auf Partys rumhüpfen... Nachdem ich auch noch eine Erkältung mitgebracht habe, habe ich dann beschlossen, endlich mal Überstunden abzubauen und mir einfach zweit Tage mitten unter der Woche freizunehmen :) Und die Zeit nutze ich jetzt gleich zum bloggen.

Schon vor langer (langer, langer) Zeit hatte ich versprochen, einen dritten Teil zu meinem Making of von CiPI zu schreiben.... Auf gehts ;D

_.;:+*’`'*+:;..;:+*’`'*+:;.  ♥   .;:+*’`'*+:;..;:+*’`'*+:;._


Teil 3: Digitale Nachbearbeitung und Colorierung

Ich habe ein Weilchen überlegt, wie ich euch am besten erklären kann, wie mein Workflow abläuft. Ein richtige Tutorial ist mir jetzt zu aufwändig, also dokumentiere ich für euch nun an Hand eines Panels der neusten CiPI-Seite meine Arbeitsschritte :) Ich hoffe, es ist alles gut nachvollziehbar so (zumindest für Leute, die wie ich in Photoshop arbeiten).

Schritt 1:
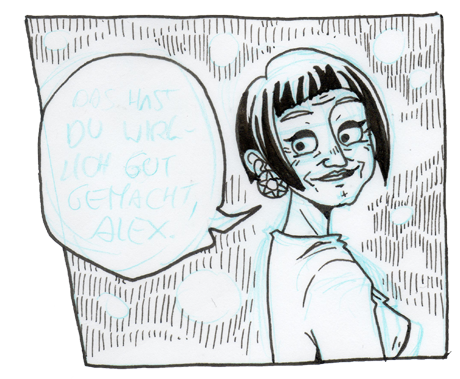
Erst mal einen Scan machen ;) Ich zeichne in A5 und scanne farbig mit 600 dpi.
 photo 1_Scan_zpsfb4968b5.png

Schritt 2:
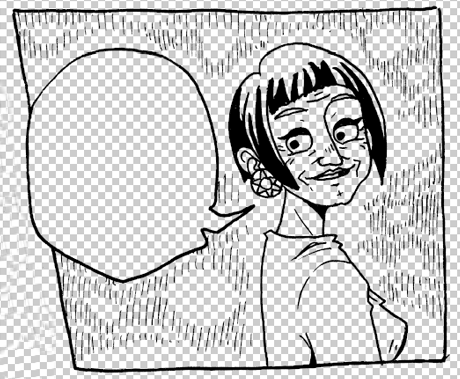
Ab in Photoshop damit und mit einer Tonwerkorrektur die blauen Linien loswerden. Für diesen Arbeitsschritt habe ich mir eine Aktion angelegt, damit es immer gleich wird. Dann stelle ich die Linien komplett frei (wie das geht hab ich hier mal erklärt).
 photo 2_Lines_zpsc998c1ac.png

Schritt 3:
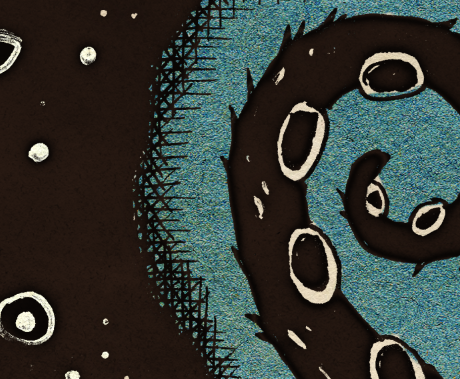
Jetzt doch mal ein anderes Panel als Beispiel. Keine Ahnung, ob das überhaupt jemandem auffällt, ausser mir selbst, aber ich bearbeite die Linien mit immer den selben Ebeneneffekten, dass sie nicht mehr schwarz sind, sondern dunkelbraun und eine leichte Papiertexturierung haben. Besonders sichtbar ist dieser Effekt in den großen Schwarzflächen.
 photo 3_Schwarzflaumlchen_zps1c1eeea6.png

Schritt 4:
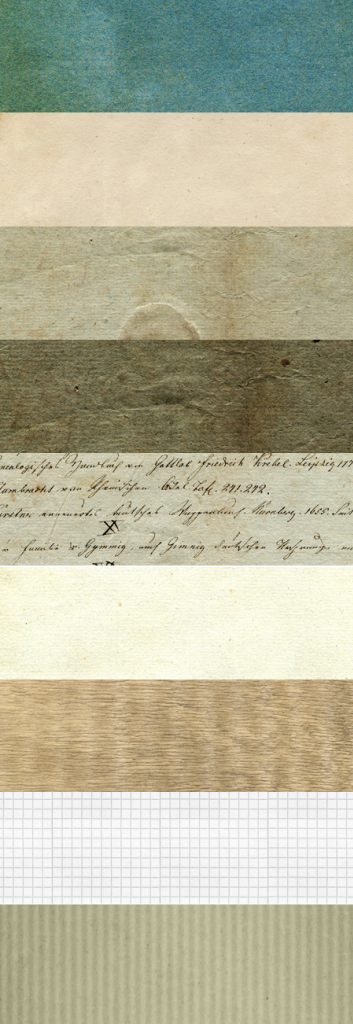
Jetzt kommt der spannendste Teil :) die Texturen. Für Circus Pulex Irritans benutze ich fast nur selbstgemachte Texturen. Mein Vater war Künstler und hat viel mit Papiercollagen gearbeitet. Als er vor ein paar Jahren starb, konnte ich nicht zulassen, dass seine Papiersammlung im Müll landet. Also habe ich kistenweise vergilbte Papierreste in meinem kleinen WG-Zimmer verstaut. Erst wollte ich selbst damit anfangen zu collagieren, aber irgendwann kam mir die Idee, dass ich die Sachen (zumindest teilweise) einfach scannen und als digitale Texturen verwenden könnte. Die Idee CiPI damit komplett zu texturieren kam sehr schnell :D der vergilbte Look und die fast monochrome Farbigkeit passt richtig gut zum historischen Setting und der allgemeinen Stimmung.

Hier mal eine Auswahl der bisher verwendeten Texturen:
 photo 6_Papiertexturen_zpsaafd2b30.png

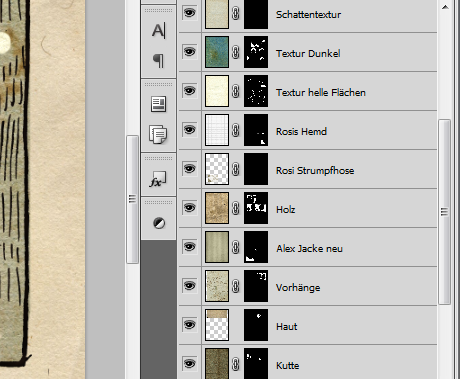
Und das Panel mit Texturen:
 photo 4_Papiertexturen_zps0023bfdf.png

Und für alle, die die technischen Aspekte auch interessiert: ich arbeite mit vielen vielen Ebenen und Masken, so dass ich alle Texturebenen, die ich auf einer neuen Seite verwenden will, einfach aus einer alten Seite herüberkopieren kann.
 photo 5_Papiertexturen_zpsf7250b28.png

Schritt 5:
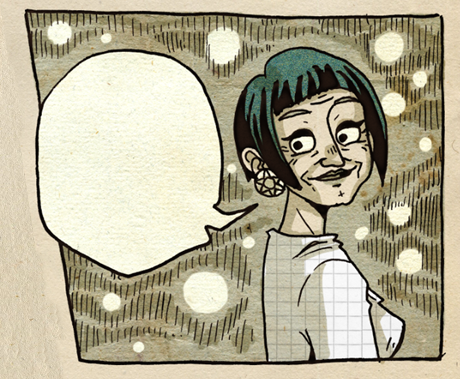
Die Schatten mache ich komplett mit einer weiteren Papiertexturebene. Diese ist in einem warmen, mittelgrauen Ton eingefärbt und auf Multiplizieren gestellt. Mit meinem Grafiktablet und einem harten Brush zeichne ich die Schatten einfach überall da, wo ich sie haben will, in die Maske.
 photo 7_Schatten_zps3e2efa9d.png

Schritt 6:
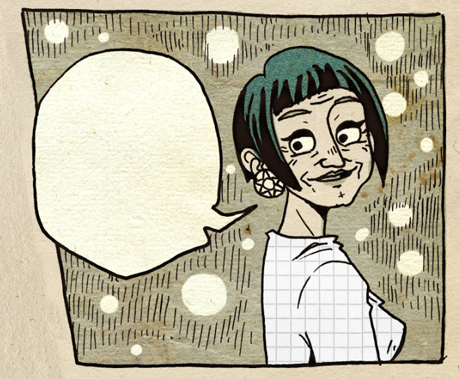
Ganz zum Schluss kommen die Special Effects. In diesem Fall habe ich ein Foto von Bokeh Lichern verwendet, dass ich auf Negativ Multiplizieren gestellt habe. Mit Hilfe von solchen Effekten versuche ich einzelnen Panels oder auch der kompletten Seite noch eine speziellere Stimmung zu geben. In diesem Fall freundliches Geglitzer ;P
 photo 8_VFX_zps55986d35.png

Schritt 7:
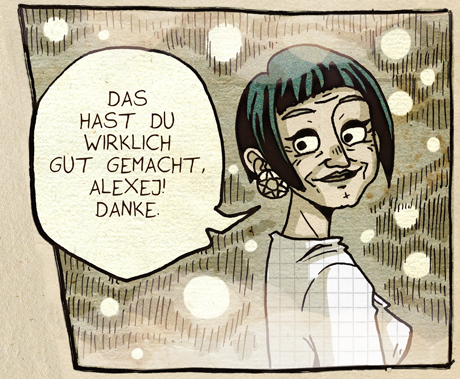
Das einzige, dass jetzt noch fehlt ist das Lettering. Als ich mit CiPI angefangen hatte, hatte ich noch per Hand gelettert. Das sah abersehr ungleichmäßig aus, daher habe ich mir aus meiner eigenen Handschrift einen Font erstellt (mit dieser Seite) und lettere seitdem damit. Ist nicht ganz optimal aber ich bin trotzdem zufrieden damit, weil ich die Vorteiler einer Satzschrift habe, der Font aber trotzdem gut zum Duktus meiner Zeichnungen passt. Zum Lettern benutze ich übrigens InDesign (ist für mich persönlich übersichtlicher zum Lettern als Photoshop).
 photo 9_typo_zps1faa0cfd.png

Fertig :D In so einer Comicseite steckt echt eine Menge Arbeit. Ich hoffe dieser Blogeintrag war interessant für den ein oder anderen von euch :) Und jetzt hopp hopp zur CiPI-Website und die neue Seite lesen (oder auch den ganzen Comic, falls ihr das noch nicht gemacht habt ;P):


Jetzt muss ich ganz dringend ein wenig faulenzen ;P

Liebe Grüße,
Kathi

2012-09-21

Archer (with PS Tutorial)

Huhu,

nachdem ich doch schon einige Tage aus China zurück bin, gibt es nun auch hier im Blog endlich ein Lebenszeichen von mir :) Beim Stöbern in den Daten aus meinem letzten Semester bin ich über das Digital Painting Totorial gestolpert, das ich dieses Semester erstellt und gehalten habe.
Ich dachte mir, das könnte doch vielleicht den Ein- oder Anderen hier ebenfalls interessieren :D

I've already been back from China for a couple of days, finally there's also a sign of life from me here in my blog :) While clicking through my data from the last semester, I stumbled across the Digital Painting Tutorial I did and held at my university. 
Sadly it's only in German but I made a lot of screenshots so maybe it can help you still. Sorry :(

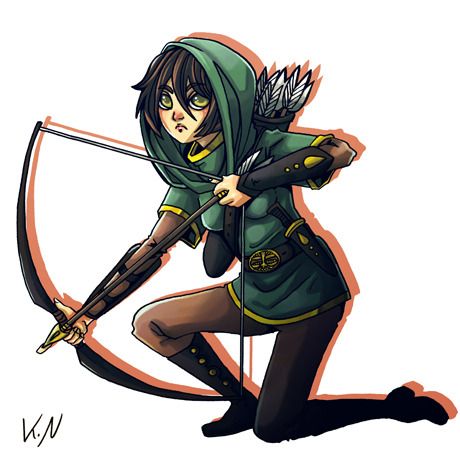
Mit meinen "Tutis" habe ich dieses Bild bearbeitet/ I worked on the following picture together with my "Tutis":

 photo Archer_Colorierung_Cell_k_zpse8e605a8.jpg
Also wenn ihr Lust habe, das Tutorium auch zu versuchen, dann klickt einfach auf das Bild, ich habe euch das Handout als PDF bei Mediafire hochgeladen :)

So if you're still interested to have a look at the Tutorial, please klick on the picture. I uploaded the handout for you as a PDF on Mediafire :)

bye bye Kathi

2011-02-14

My Valentines Day

Happy Valentines Day everyone :)

I hope, you will spend a nice day with the Ones you love!

I did a mixed media drawing I wanted to send to my friends as a postcard. I wanted to do a mixed media tutorial already for a long time so I finally took the chance to take pictures during my working progress and to write my thoughts down :)

Maybe it didn't turn out as a real tutorial, more a workthrough or a "how I do things" but I still hope it can be interesting for you!

For this coloring technique, I will basically use
Pastel chalks
Color pencils
Copic markers
and Opaque white.

Here we go:

1st Step: sketch
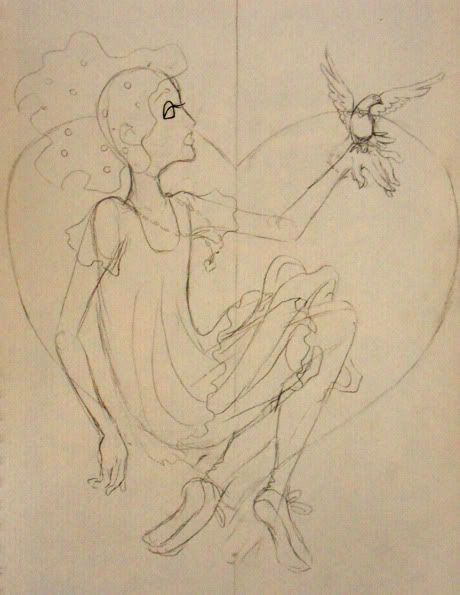
Every picture starts with a sketch :) If I feel like it, I first skribble some concept sketches in a sketchbook or on a loose piece of paper, but more often I just sketch on the drawing paper.
For sketching, I like to use a mechanical pen, strengh 0,5mm, 2B. The lines are dark enough to look nice but I can still erase it easily.
About the paper, I used for this drawing: For mixed media techniques I recommend to use thick drawing paper, around 200g, with a nice paper structure. For this drawing, I used a very nice yellowish paper with a very heavy structure.
Photobucket

2nd step: lineart
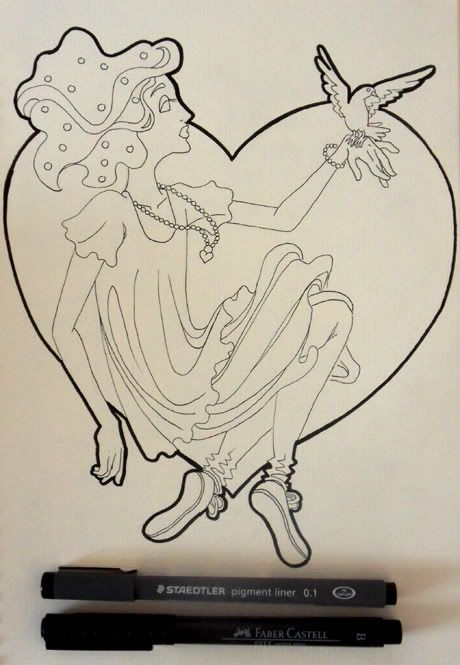
If you use copic markers or other alcohol based markers, you should use an alcohol proof pencils or ink to draw your lines. I didn't, because I don't have them at the moment. I had to work really careful with the markers so the lines won't bleed out.
How you line your artwork is a question of personal style :) I don't want too dominant lines in my final drawing so I made the inner ones very thin and just framed the whole thing with a thicker line.
Photobucket

3rd step: pastel chalks
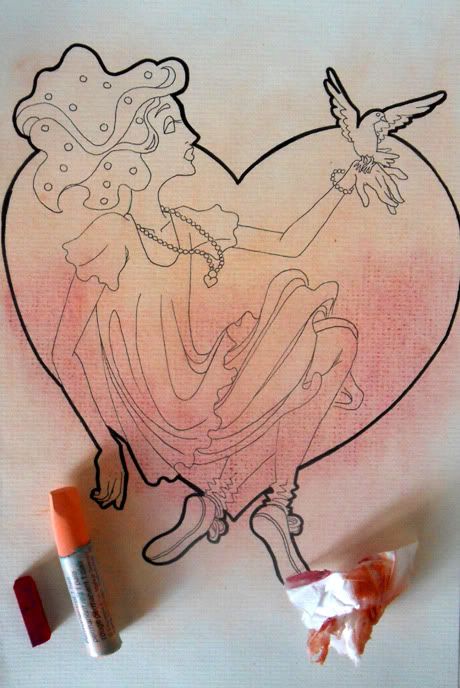
That's a fun part *laughs* I create a color base with pastel chalks. I just put the color on the paper and blur it with a paper tissue. If you don't know, how to do it, maybe practice how the colors mix on a second piece of (the same) paper. As you can see, I used two very different kinds of pastel chalks which react completely different.
The light orange one is very very soft and easy to smooth. Although the paper has this heavy structure, the soft chalk dust goes everywere and the structure is not visible.
On the opposite the hard red chalk. That one is not so easy to smooth out. The structure of the paper is clearly visible. I really like that effect, that's why I chose the paper. The structure won't be that visible if you use paper with a normal surface, of course, even if you use hard pastel chalks :)
Photobucket

The nice thing about pastel chalks is, that you can erase them with a normal eraser! I take the color away from her face and arms because I'm afraid it will become too dark if I add a layer of markers.
If you don't like the idea, that this pastel chalk base coloring will be still visible when you add other layer of color, you can erase them from your whole drawing. I like the effect, that's why I just erase it in the skin parts.

Photobucket

4th step: skin
I love to do skin, that's why I always do it first *laughs* I didn't take detailed pictures while I did the skin, there will come a more detailed description about my technique later. But you can see in the picture, what colors I used.
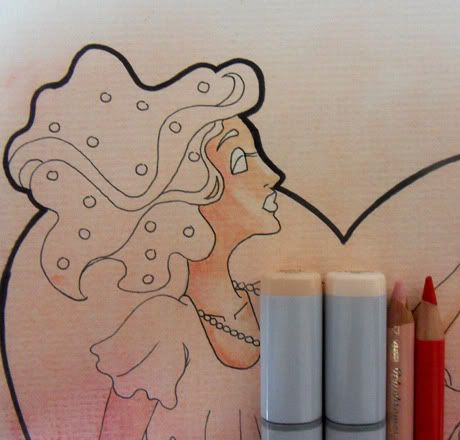
Photobucket

5th step: hair
I first color the whole shape with one copic color.
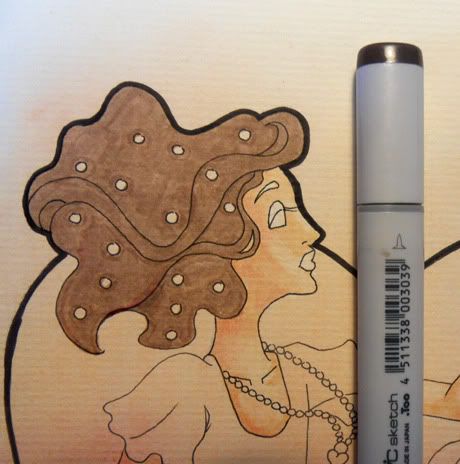
Photobucket

I draw some gradients and shadows with color pencils. Note, that I never use real black for my colorings. My favorite color pencil is a really dark blue which looks really nice with the light pinkish and yellowish colors I want to color this drawing with.
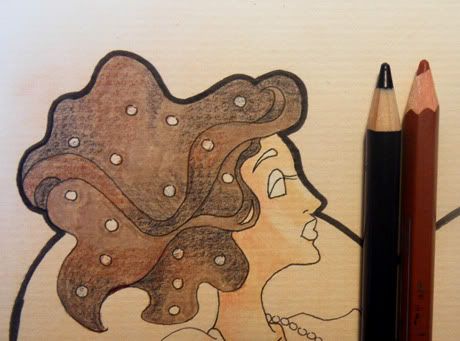
Photobucket

I take the brown basic color and start to smooth the colors. If you put a second layer of copic color on a dried first one, it becomes much darker, which is a really nice effect. In this case, the dark brown is too dark for my taste so I just use it in the darkest places of the hair. I smoothed out the rest with my skincolor. I like the fact, that it adds a slighty warm yellowish shade to the cool brown. For this purpose, you can also use the copic colorless blender (which I don't have). Important is, that you work in this step very loose and fast so you get nice smooth gradients.
In the end, I take my fleshcolored color pencil. This step adds another layer of warm color on the cool brown so it works better with the skincolor. I also think, the coloring looks much smoother and creamy after this step.
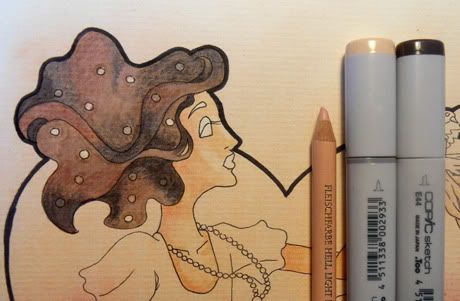
Photobucket

6th step: skirt
I documented the skirt quite well so maybe it's easier to understand my coloring technique here then in the last step.

Like in the hair, I first color the whole shape with a basic copic color. Then I add gradients and shadows with color pencils.

Photobucket

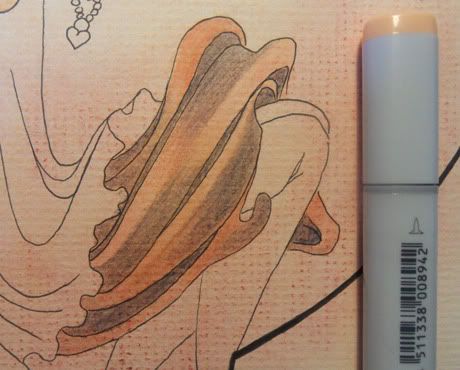
I take the basic color and smooth the color pencils. In this picture you can see the difference between the smoothed parts (under her knees) and the parts I didn't treat yet. The smoothed parts look almost like water color while in the other parts, the paper structure is still quite visible.
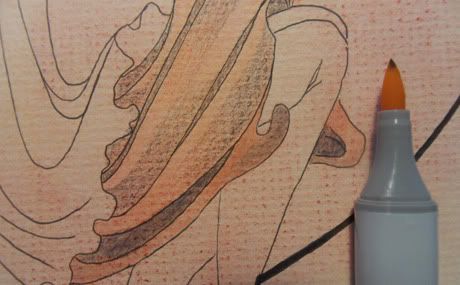
Photobucket

Here I did the whole skirt.

Photobucket

Again, I use the flesh color to make everything even more smooth and creamy.

Photobucket

7th step: dress + jeans
The same procedure with the dress: Basic color, and shading with color pencils.
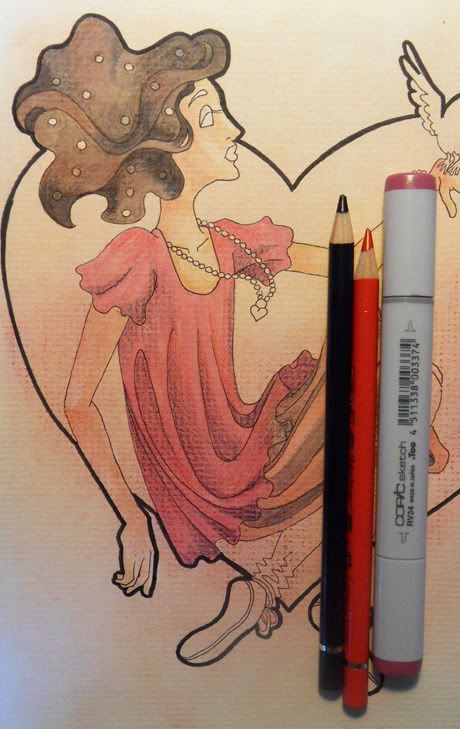
Photobucket

Smoothing everything out with the flesh colors.
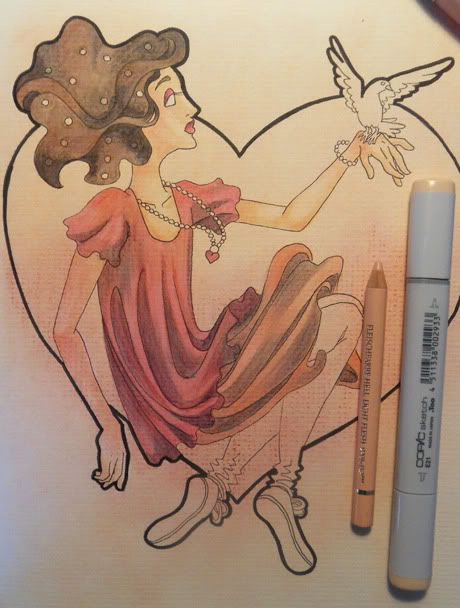
Photobucket

I do the same thing with the trousers. As you can see, the technique also works with the very cold blue. It makes it look warmer and it fits better with the other colors.
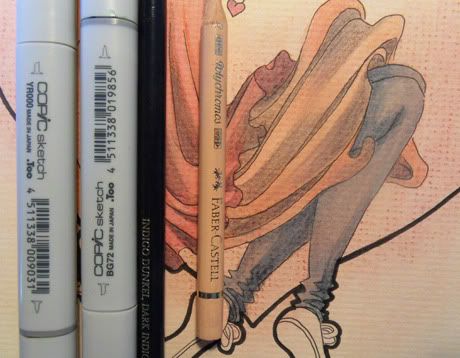
Photobucket

8th step: detail
Some small detail, like the shoes and the bird are still missing, so I do them in the same way. That's how the whole picture looks now:
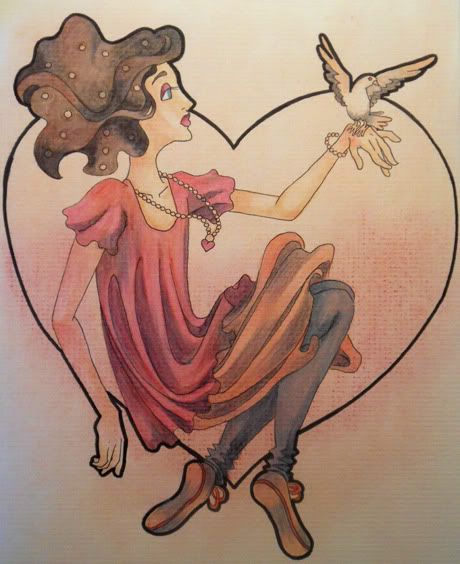
Photobucket

9th step: background
The heart in the background looked dull so I took my fleshcolor and just added a layer. I worked from the bottom to the top so I can make the pastel chalk gradient a little bit nicer.
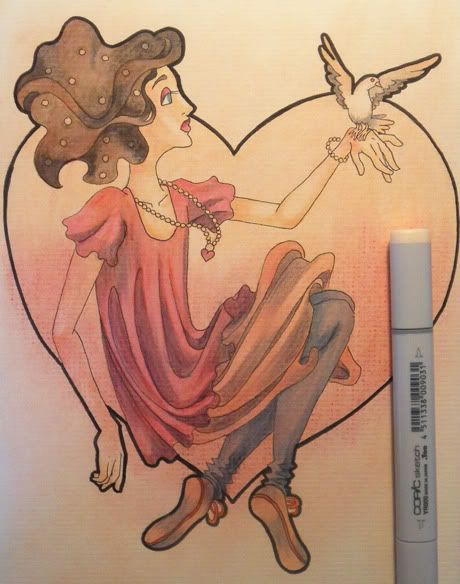
Photobucket

10th step: white
I take a very small brush and my opaque white to add highlights. I have a very nice white from Deleter, which is meant for Manga drawing. It's very covering although it's so liquid and it's nice to paint with it. Of course you can also use every kind of other opaque color like acrylics.
The white highlights look very nice on the yellowish paper.
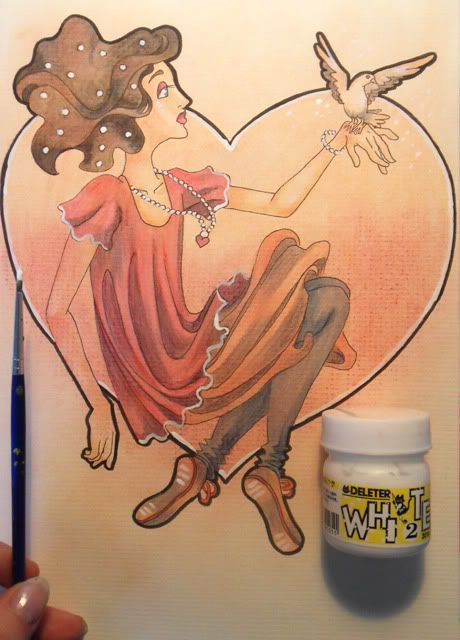
Photobucket

11th step: red lines
I think, the black lineart is still too hard for the light coloring so I take my red color pencil and draw the lines again with it. The whole thing looks softer now. I also drew a pattern in her skirt with the pencil.
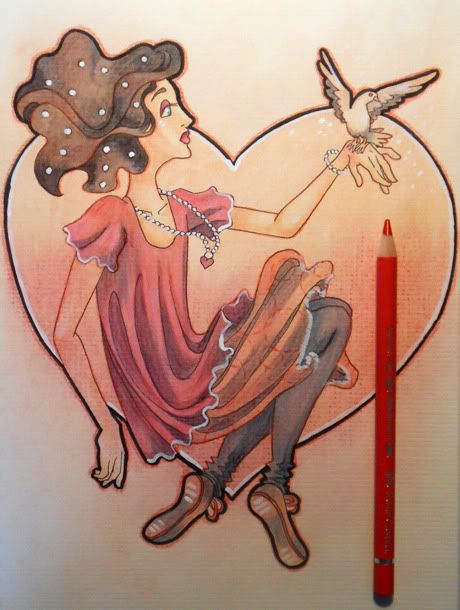
Photobucket

DONE :)

I'm finally satisfied with the picture. I really like how the colors work together. It's not a monochrome picture, I used brown, pink and blue in it, but because of my mixed media technique, the whole thing works.

A little bit more about the drawing material I used:
- Soft and hard pastel chalks (I like the soft ones more)
- Deleter opaque white (+brush)
- Eraser (It would be nice, if I also had a smaller one) and mechanical pen (0,5mm, 2B)
- Color pencils (I'm in love with Farber Castell's Polychromos! They're expensive but worth every cent. My technique only works with soft color pencils so if you don't have Polychromos but water color pencils, they should also work fine).
- Markers (I use mostly Copics Sketch, because I love the brush pen. I also had good experiences with Neopiko markers! There are other alcohol based markers, like Touch, but they don't have the brush pen as far as I know.)
- Multiliner (the thin one is from Staedler, 0,1mm, the other one is a brush pen from Farber Castell)

As you can see, I used a very limited amount of colors for this drawing, which I really like. Esecially when it comes to the colors I use for the shading, I always try to limit myself so the whole drawing doesn't become too colorful.
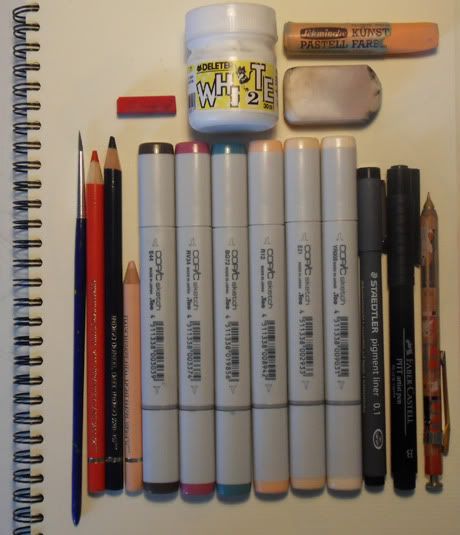
Photobucket

Here is the final picture:

Photobucket

And a detail. I really love the texture of the paper :)
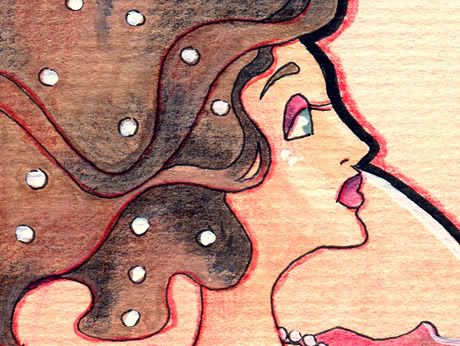
Photobucket

Ok... I hope, the whole thing was interesting for you :D If you have questions about my technique or my material, don't hesitate to ask.

Have a great day <3
Kathi

2010-07-26

Blast Technique

First post here in my brand new blog :)

I'm exited ^3^///

I've been dying to do this post for a long time but my old blog wasn't the right place so I decided to start a new one just for illustrations, my graphic design and things I want to share with you.

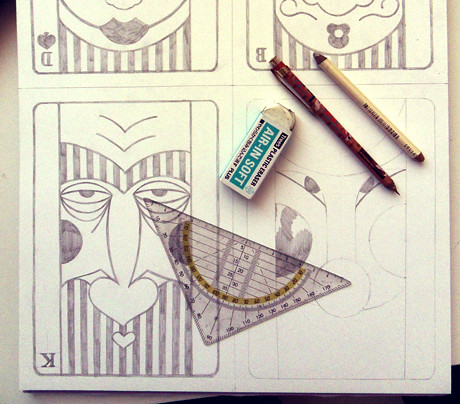
As you maybe know, I'm studying communication design in a cute little city in the south of Germany: the lovely Augsburg <3 This term I got the chance to attend the illustration class *yay* The first project we did was illustrationg playing cards while using a really interesting technique. The technique is called "blast technique" ("Absprengtechnik" in German) and I thought it was prety interesting to try it out. The nice thing about this technique is, that the result looks like wood or linoleum cut but is far not that time consuming.

I documented my work and thought, why not sharing it :)

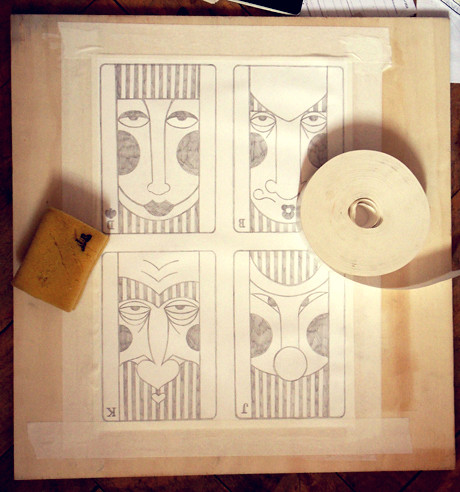
1st step: You will need
- pencil, eraser and whatever you need for your sketch
- a piece of paper (as thicker as better)
- a flat wooden board a little bit larger than your piece of paper
- bone glue tape
- a clean sponge
- opaque white (water soluble)
- ink (waterproof)
- brushes (a very small and a normal one)
- cutter and ruler

2nd step: Do a pencil sketch


Of course you can sketch whatever you want :3 But take care of a few things.
- Don't use too small details and too thin lines (at least 2mm).
- Try to work clean. No pencil strokes where you don't need them
- keep in mind, that the illustration is going to be black/white so play with shadows and lights :)
- leave a white frame on the paper (at least 2 cm)

3rd step: Glue it on the board


Wet the backside of your drawing carefully with the spoon. Don't bother, that the paper is going to wave. The waves are going to disappear after the paper drys. Then place it in the middel of the board. Wet four pieces of the bone glue tape to make it sticky and glue your piece of paper on the board with them. Now let the paper dry completely. The waves should be gone now.

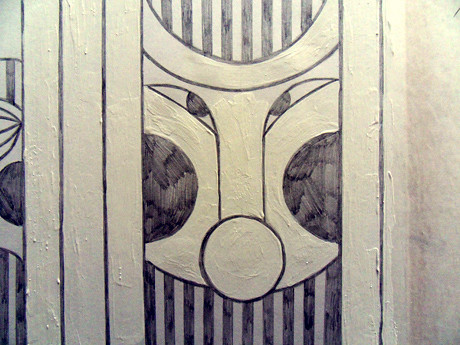
4th step: Paint it white


Now you need the small pencil and the opaque white.


Paint everything white, that should stay white. I know, that sounds really odd but you're going to understand this step later :D
You can use a little bit of water to make your white more flexible but take care, that you don't use too much. Paint a thick layer of white. Now you know, why I recommended you not to draw too many details. This step is really time consuming but it's going to be worth all the work :3

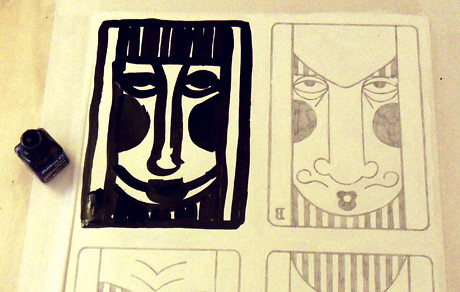
5th step: Paint it black


Make sure, that the white is completely dried! Now take a brush and the (waterproof!) ink and paint roughly everything black, that should be black. No need to work clean at all but work as fast as possible and don't press the brush on the paper.


Looks odd, doesn't it *laughs* but don't worry :)

6th step: Make it wet


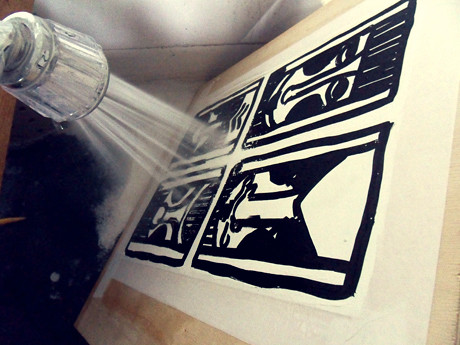
Let the ink dry. Now, place your board in the shower and usethe shower head to "blast" the water soluble white of. Only the waterproof black will stay! Your shower head probably won't be able to do it on it's own so use the sponge to dab the white of. Be careful and don't hurt the paper.


Almost done :) Now let your work dry completely. Don't worry, the waves are going to dissapear again because we glued it on the board. You can cut the dried illustration out with a cutter and a long metal ruler.
As you can see on the photo above, theres an ugly dark spot on the eye of my king. That's because I used too many water to thin my opaque white down. I correct this mistake with white correction ink.

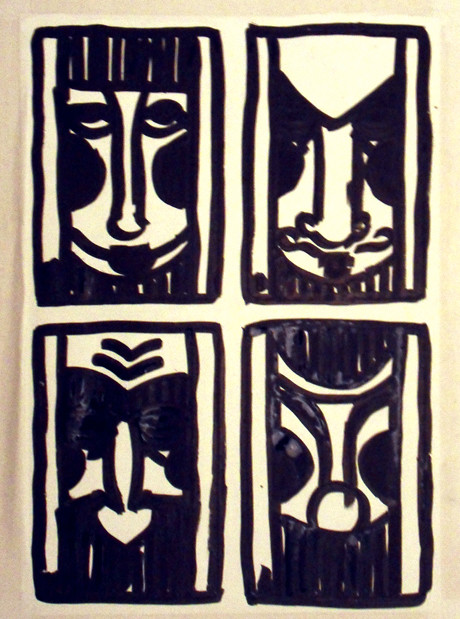
7th step: Finally


Here's my final work, scanned and cleaned. I shopped the letters and the spades if you wonder.

I really like the final result because it looks so handmade and really fits the drawing style I chose for this four illustrations!

Last step: Just for the laughs

Well, of course this complicated technique didn't work at all at my first try. That's one of the reasons, why I do this tutorial *laughs* to prevent you from the mistakes I did.

This was my first try:


You see, why you should use waterproof ink *laughs* I also had far too many detail and because I didn't sketch clearly, you can see my pencil strokes everywhere!

Done :D
I really hope, you enjoyed this tutorial.

Bye bye,
Kathi
Related Posts Plugin for WordPress, Blogger...